


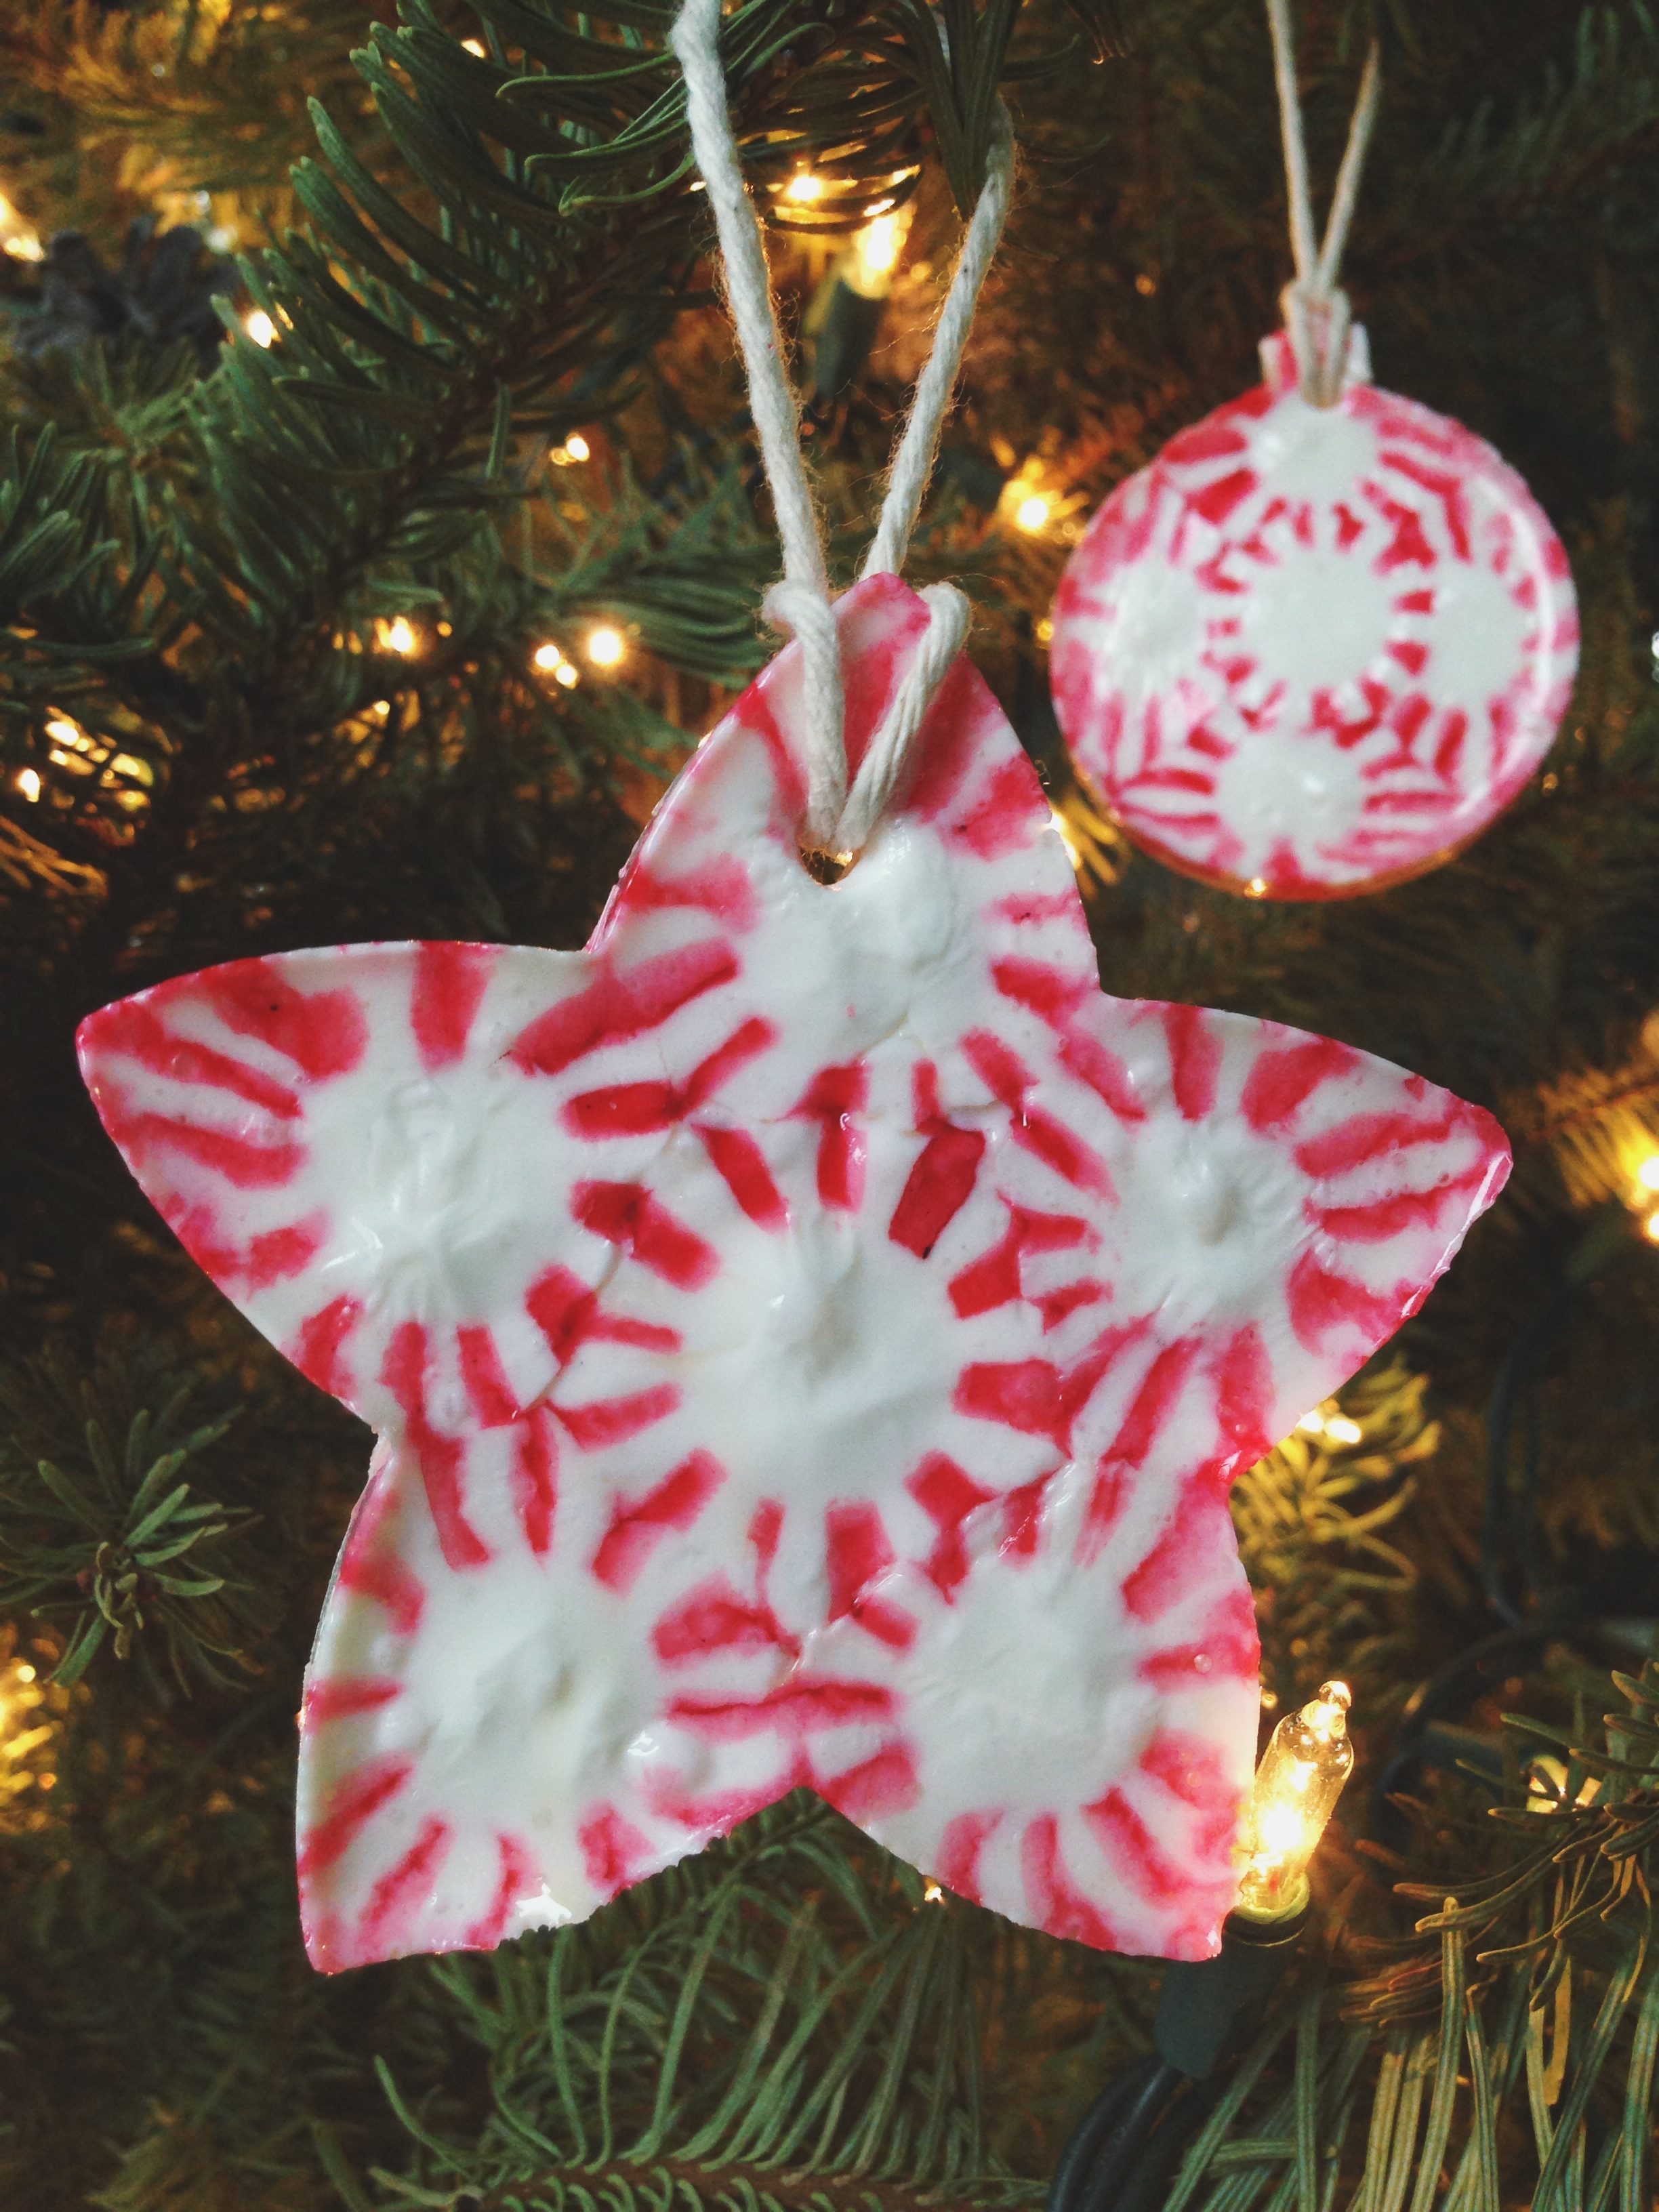
Peppermint candies are so festive and classic, no matter what time of the year it is, the sight and smell of peppermints always reminds me of the holidays. Peppermint Candy Ornaments are thrifty and quick to make, they’re a handmade project that is perfect for this time of the year, when we’re all running a little lower on money and time! You could make a dozen of these edible ornaments at just a dollar per bag of peppermints!
These melted candies aren’t just for the tree either! Use this method to create cute little edible toppers for cupcakes or brownies (what is more festive than the flavors of chocolate with peppermint?!).
I first melted peppermints in cookie cutters after seeing the idea in an American Girl magazine, back in the 90’s (I’m pretty sure that a project centered around scalding hot, melted sugar would not make it into a children’s magazine these days). As easy as this project is, I had a difficult time finding anything similar to this online, so I decided to share it.
Include your kids in creating this fun craft project, spend an afternoon making homemade ornaments for decorating your Christmas tree this year!

Metal cookie cutters are a must! I love using this: Vintage Christmas Ornament Set and this: Snowflake Set!
Peppermint Candy Ornaments
- peppermint candies
- metal cookie cutters
- non-stick cooking spray
- parchment paper
- toothpick or skewer
- twine or ribbon
Preheat oven to 350F. Line a baking sheet with parchment paper. Spray the inside of each cookie cutter with cooking spray. Lay cookie cutters on baking sheet and fill with a layer of peppermints.

Bake for 3-9 minutes. Keep an eye on candy as it melts, remove from oven when candies have melted together.

Lightly coat a toothpick with cooking spray and use it to make a hole in each group of candies. Let candy sit inside cookie cutter until it re-hardens. Once hard, carefully stretch out the cookie cutter, pulling it away from the candy, to pop out your ornament.
Wrap these peppermint treats individually in plastic wrap, if you’d like.
• Many of you have contacted me about a sealer that would be suitable for this project. Unfortunately I do not know of any available sealants that would work with these ornaments (the moister of sealers causes the candies to melt). Similar to a gingerbread house, these ornaments may not last for more than a season but it’s a fun (and inexpensive) project to create every Christmas season!
• These ornaments are really so easy, but it may be helpful to make a trial run: Place one peppermint-filled cookie cutter into the oven to get an idea of how fast the candy will melt and how quickly it will cool and re-harden after you remove it from the oven.
• Try turning down the temperature of your oven, so that candies will melt more slowly, if your candies are melting unevenly or at different rates.
• Squeeze as many peppermints, side-by-side, into your cookie cutter as possible. If peppermints melt into too thin of a layer, try layering peppermints in the cookie cutter to make a thicker, more sturdy, ornament.
• Large, simply shaped, cookie cutters work best for this project. The more intricate the cutter, the more likely ornaments will break when removed from their cookie cutter mold.
• Don’t forget to be careful around the hot metal and melted candy! This is a fun craft to make with children, just be sure to provide plenty of supervision.
• Try not to handle the ornaments too much because they can get sticky, but they should be fine after they’re hanging on the tree.
Here’s to a happy handmade Christmas!


Anyone know what sealer won’t melt candy? Recommended seller not available..
I made these in the 80’s/90’s. When they have set 24 hrs we would take an oil based poly and brush two coats on them each side. The ornaments would last 2-4 yrs. when storing them, it has to be in a cool place and we wrapped in parchment paper then bubble wrap because of being fragile.
try placing the ornament in clear cellophane and tie it with a ribbon to hang on the tree. keeps bugs off and won’t be sticky (or dusty).
I had trouble with the tooth pick hole. Can you give me any pointers with this?
Edwina Leahey
Try letting the candies stay in the oven for a little longer, to let them get a little more melted and softer, if a hole can’t easily be created.
Also, let them cool for a few minutes once they’re out of the oven. Not too long though!
I used a bamboo skewer–flat end to make the hole and the pointy end to clean it up once the candy had totally cooled. I waited a few minutes (2-3?) before pushing the skewer onto the ornament.
Use a straw
I am going to make these today. I am going to try putting a coat of clear nail polish on them.
Did the clear nail polish work..??
Also mod podge prob work. Let us know how polish works
Mod Podge is not recommend, as it causes the candies to melt and the peppermint stripes to run.
One year my some made a frame with these candies and we had ants all over our door(it was a magnetic frame), actually eating holes in the candies so I sprayed it with hairspray. That seemed to do the trick. But, sadly, it had to be thrown away since I wasn’t sure how it would do in the attic over the summer.
Mine were sticky, so I lightly brushed corn starch on them…Worked like a charm!
Do you think just plain Elmer’s glue would work as a sealant?
There is a food grade sealant you can get. Not sure where to get it. Saw it on another site.
I am going to try using candy canes broken up for a more colorful ornament. I will let you know how it works out. wish we could post our own pic on here..
I’d rather not put anything on these that isn’t edible since they would look very tasty to a child. Or an adult. I’ll just make new ones each year.
Do the cookie cutters come off pretty easy or has anyone ever tried lightly coating the cookie cutter with vegetable spray?
These are precious!! I am going to hang on a small twig tree instead of tree. Great idea but I am a bug freak! Worth trying this year for the fun of it! Thank you for the idea and other suggestions ! I guess no one hit back on the clear polish idea?
I used to make these years ago and used licorice strings for hangers. Never, ever considered keeping them past the holidays. Also works with crushed colored sugar sticks!
They can be brushed with confectioner’s glaze to preserve them :)
I was wondering if you could also make these with any other hard candies. Like jolly ranchers for a stain glass looking type of ornaments.
Any reason why you couldn’t eat them after they’ve been cooked in the oven? Could you put them in a cup of hot chocolate?
Yes, they can be eaten! Smaller ones are also cute as a cookie or cupcake topper!