


Peppermint candies are so festive and classic, no matter what time of the year it is, the sight and smell of peppermints always reminds me of the holidays. Peppermint Candy Ornaments are thrifty and quick to make, they’re a handmade project that is perfect for this time of the year, when we’re all running a little lower on money and time! You could make a dozen of these edible ornaments at just a dollar per bag of peppermints!
These melted candies aren’t just for the tree either! Use this method to create cute little edible toppers for cupcakes or brownies (what is more festive than the flavors of chocolate with peppermint?!).
I first melted peppermints in cookie cutters after seeing the idea in an American Girl magazine, back in the 90’s (I’m pretty sure that a project centered around scalding hot, melted sugar would not make it into a children’s magazine these days). As easy as this project is, I had a difficult time finding anything similar to this online, so I decided to share it.
Include your kids in creating this fun craft project, spend an afternoon making homemade ornaments for decorating your Christmas tree this year!

Metal cookie cutters are a must! I love using this: Vintage Christmas Ornament Set and this: Snowflake Set!
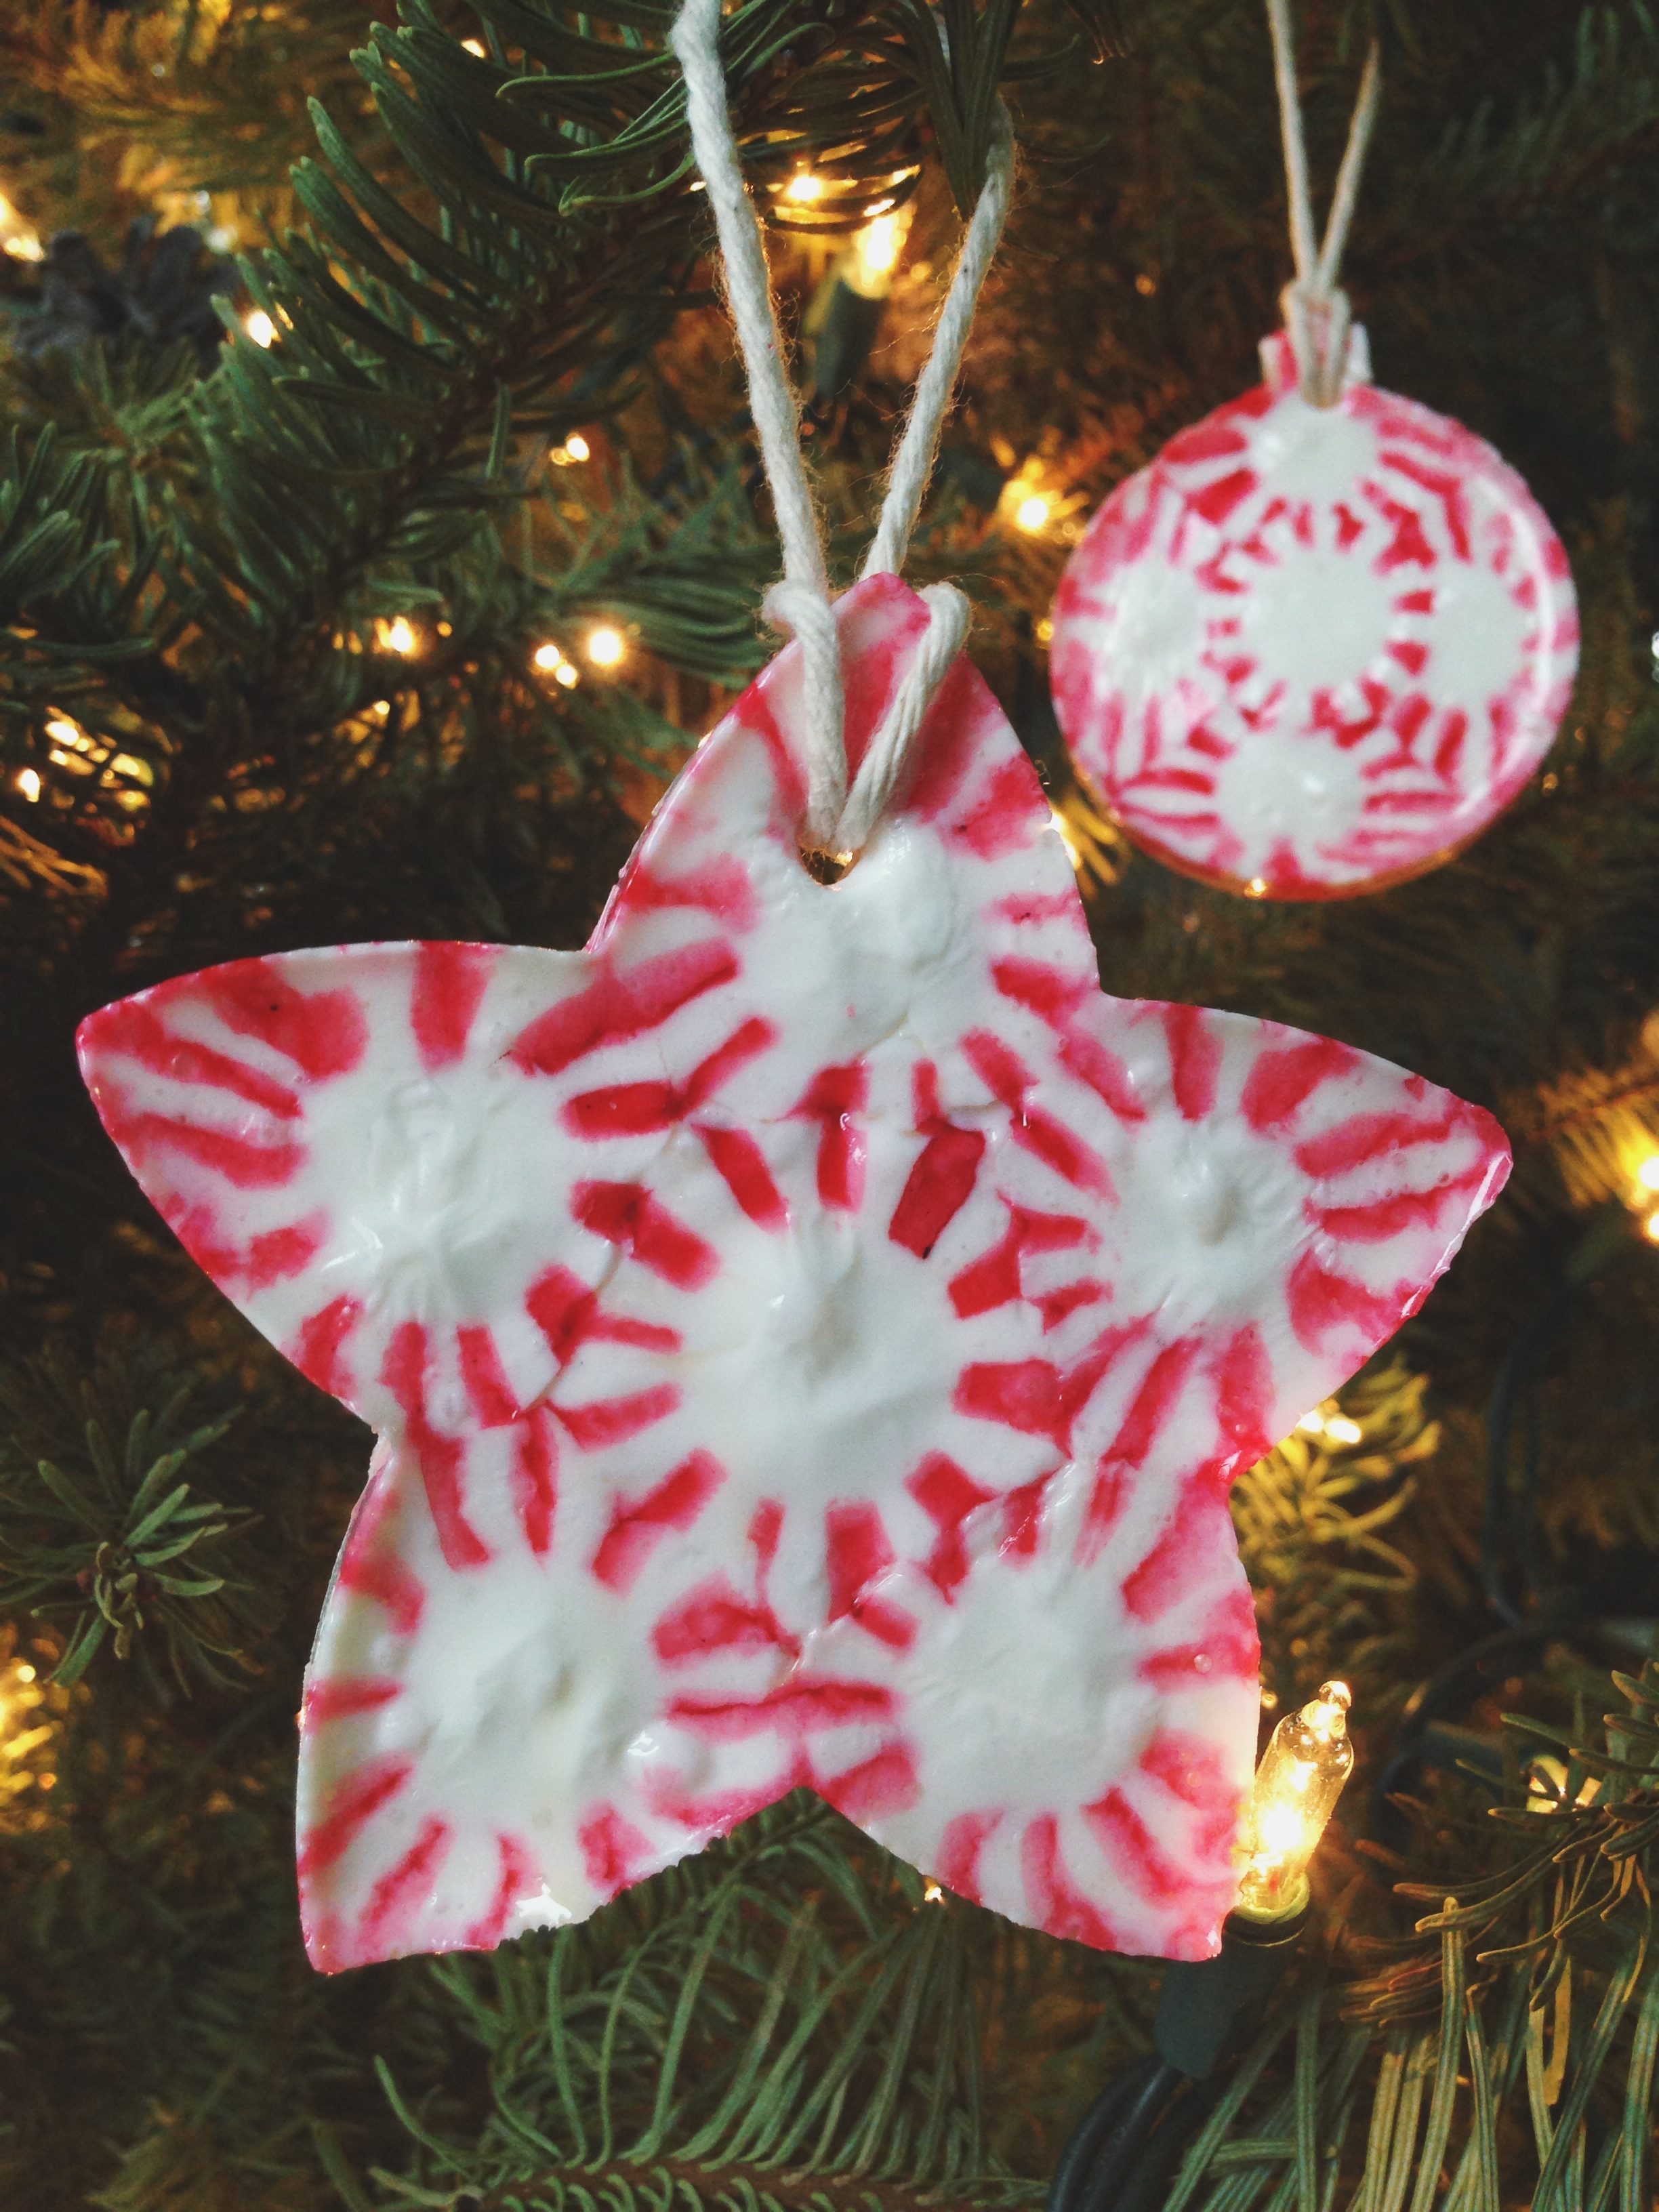
Peppermint Candy Ornaments
- peppermint candies
- metal cookie cutters
- non-stick cooking spray
- parchment paper
- toothpick or skewer
- twine or ribbon
Preheat oven to 350F. Line a baking sheet with parchment paper. Spray the inside of each cookie cutter with cooking spray. Lay cookie cutters on baking sheet and fill with a layer of peppermints.

Bake for 3-9 minutes. Keep an eye on candy as it melts, remove from oven when candies have melted together.

Lightly coat a toothpick with cooking spray and use it to make a hole in each group of candies. Let candy sit inside cookie cutter until it re-hardens. Once hard, carefully stretch out the cookie cutter, pulling it away from the candy, to pop out your ornament.
Wrap these peppermint treats individually in plastic wrap, if you’d like.
• Many of you have contacted me about a sealer that would be suitable for this project. Unfortunately I do not know of any available sealants that would work with these ornaments (the moister of sealers causes the candies to melt). Similar to a gingerbread house, these ornaments may not last for more than a season but it’s a fun (and inexpensive) project to create every Christmas season!
• These ornaments are really so easy, but it may be helpful to make a trial run: Place one peppermint-filled cookie cutter into the oven to get an idea of how fast the candy will melt and how quickly it will cool and re-harden after you remove it from the oven.
• Try turning down the temperature of your oven, so that candies will melt more slowly, if your candies are melting unevenly or at different rates.
• Squeeze as many peppermints, side-by-side, into your cookie cutter as possible. If peppermints melt into too thin of a layer, try layering peppermints in the cookie cutter to make a thicker, more sturdy, ornament.
• Large, simply shaped, cookie cutters work best for this project. The more intricate the cutter, the more likely ornaments will break when removed from their cookie cutter mold.
• Don’t forget to be careful around the hot metal and melted candy! This is a fun craft to make with children, just be sure to provide plenty of supervision.
• Try not to handle the ornaments too much because they can get sticky, but they should be fine after they’re hanging on the tree.
Here’s to a happy handmade Christmas!


Im making these tonight so hoping they turn out good since nothing I attempt ever does. Lol
I’m going to try this
Reblogged this on L'aventure.
Could they be sprayed with a clear coat of polyurethane so they are not sticky ?
I’ve also made plates with these mints. Just laid the mints with sides touching in on a parchment lined cookie sheet in a design (square, circle, etc) and cooked until melted. After they cool, they are awesome to cupcakes on.
Never thought to make ornaments. Will try next year.
Can’t wait to try this with my grandkids
have you tried this angela. i thought of the same thing , love to put the spearmint into the tree and break up the colored canys to look like lights and bulbs
Such an awsome idea!
I’m planning to make these this year. I am planning to use peppermint and spearmint candy both so I can have reds and greens. I was also thinking about using some of the mixed hard Christmas candy that can be picked up at Dollar General for next to nothing. We’ll see how that works out!
Super cute, shared on FB here: https://www.facebook.com/heartofaphilanthropist/posts/902432046493621
Cool Idea!
Has anyone attempted painting them with clear nail polish? Think they would keep longer?
You could always paint them with a clear coat paint. That should definately stop them from sticking but as you said they would no longer be edible. I found some mini gingerbread houses that were ornaments at CVS last Christmas they were awsome. My sons ate them.
I’m wondering if there’s anything you can put on the outside of the finished product so that it doesn’t get sticky over time? Like a top coat or lacquer. Of course you wouldn’t be able to eat it but if you are using them as decoration why wouldn’t you want to protect them. Does anyone knows if there’s anything that won’t destroy the candy?
http://www.plaidonline.com/royal-coat-finishes-high-gloss-finish-spray/109/1461/product.htm.
They said a finishing spray by Royal Coat
Jen it states in the tips that a reader tried several different finishes, and found one that worked, called Royal Coat by Plaid. I am limited to Michaels in our city, I hope they carry it!
Love these
I made a peppermint plate for New Years and put a cake on it
How did you make the plate? What type of mold did you use?
how? what did you use for the mold? I love the idea!
What about using ribbon candy for some more colorful ones?
Interested in your site.! Love new ideas!
Did you ever had ants because you have candies on the tree not wrap?
Question, when do you put the hole in them for ornaments?
I know I’m a bit late on this response, but I just tried modge podge on them (based on Michael’s staff’s recommendations) and it does NOT work! It basically smears the red and white colors when you put it on. So, save yourself some money and try the Royal Coat spray (if you can find it!)
Did anyone try Modge Podge for the top coat?
Have you actually tried this, the dipping in wax? Does it change the look (like more of a matte finish)?
If you dip them in melted Parafin wax they will stay non stick….Plus you can wipe off dust…
I’m going to try this
I wonder how these would look made with crushed peppermints? Crushed candy of different colors mixed together randomly or arranged carefully could also look like stained glass! :)
These Pepperment Ornaments are so clever, I love making homemade things, You are so clever
Thanks for sharing.
Are these edible after making? How would you preserve them individually and how long woyld they be good for consumption? Thanks!
Love the peppermint oranemts idea!! I am gonna try this with my kids thanks for sharing!!!
thanks for sharing.
Anyone know if the sealer mentioned at the end of the article is found in stores?
I couldnt find that one either. I looked at other peppermint/candy cane crafts and some people have used clear acrylic spray. Now i havnt tried it so i dont know if it melts them. but its not $30 and its everywhere from walmart, hobby lobby and micheals. Hope that helps you and others.
Has anyone tried another option for the Gloss finish? I’ve looked and the spray she suggests is not available, and one place ships it to the US for like $30 a can. I’m not a crafty person, so I wouldn’t begin to guess. Any help or recommendations are helpful to make these with a gloss finish. Thanks!
Love this idea. Do they still smell of peppermint?
What cute ideas for triming the tree…i would like to see more…i well have to get some peppermint and make some…
Can’t wait to try these with my grandchildren!!!
Where did you find the star cookie cutter that size?? I just ordered one that is five inches and I’m afraid it’s not going to be big enough to fit six candies.
Doing a trial run and they have turned out great, but having trouble with the toothpicks. Any particular kind work best? I was thinking a flat headed toothpick, but did not know. Any suggestions would be great. Thanks.
I just used a regular toothpick. Try letting the candies stay in the oven for a little longer, to let them get a little more melted and softer, if a hole can’t easily be created.
I just wrapped them in a clear plastic Christmas or gift wrap and poked a hole for the twine hanger to pull through. Also could use saran wrap. That way they are edible. I have used Brach colored sparkle candies and cut rock Christmas candy. I used a cookie sheet sprayed lightly with a oil based cooking spray and just made snow flake shapes by pushing the candies close together. When they cooled I just twistedbthe cookie sheet like you would an ice tray and the snow flakes popped loose easily.
Did you try Modge Podge? Is this the same stuff?
Bought my supplies, waiting til after Thanksgiving to try it.
I am making one for each of the horses in our barns! But no sealer…these will be Christmas Eve treats! Thanks for sharing.
My dog bones, flowers, and stars did great. Star starting breaking last 2 batches. Cross cracked after 2 tries. I tried everything. Also I couldn’t get hole to work with toothpick. It wouldn’t go all way thru. Any suggestions?
Try letting the candies stay in the oven for a little longer, to let them get a little more melted and softer, if a hole can’t easily be created.
You can use lifesavers too! The look like stained glass!!!