


Peppermint candies are so festive and classic, no matter what time of the year it is, the sight and smell of peppermints always reminds me of the holidays. Peppermint Candy Ornaments are thrifty and quick to make, they’re a handmade project that is perfect for this time of the year, when we’re all running a little lower on money and time! You could make a dozen of these edible ornaments at just a dollar per bag of peppermints!
These melted candies aren’t just for the tree either! Use this method to create cute little edible toppers for cupcakes or brownies (what is more festive than the flavors of chocolate with peppermint?!).
I first melted peppermints in cookie cutters after seeing the idea in an American Girl magazine, back in the 90’s (I’m pretty sure that a project centered around scalding hot, melted sugar would not make it into a children’s magazine these days). As easy as this project is, I had a difficult time finding anything similar to this online, so I decided to share it.
Include your kids in creating this fun craft project, spend an afternoon making homemade ornaments for decorating your Christmas tree this year!

Metal cookie cutters are a must! I love using this: Vintage Christmas Ornament Set and this: Snowflake Set!
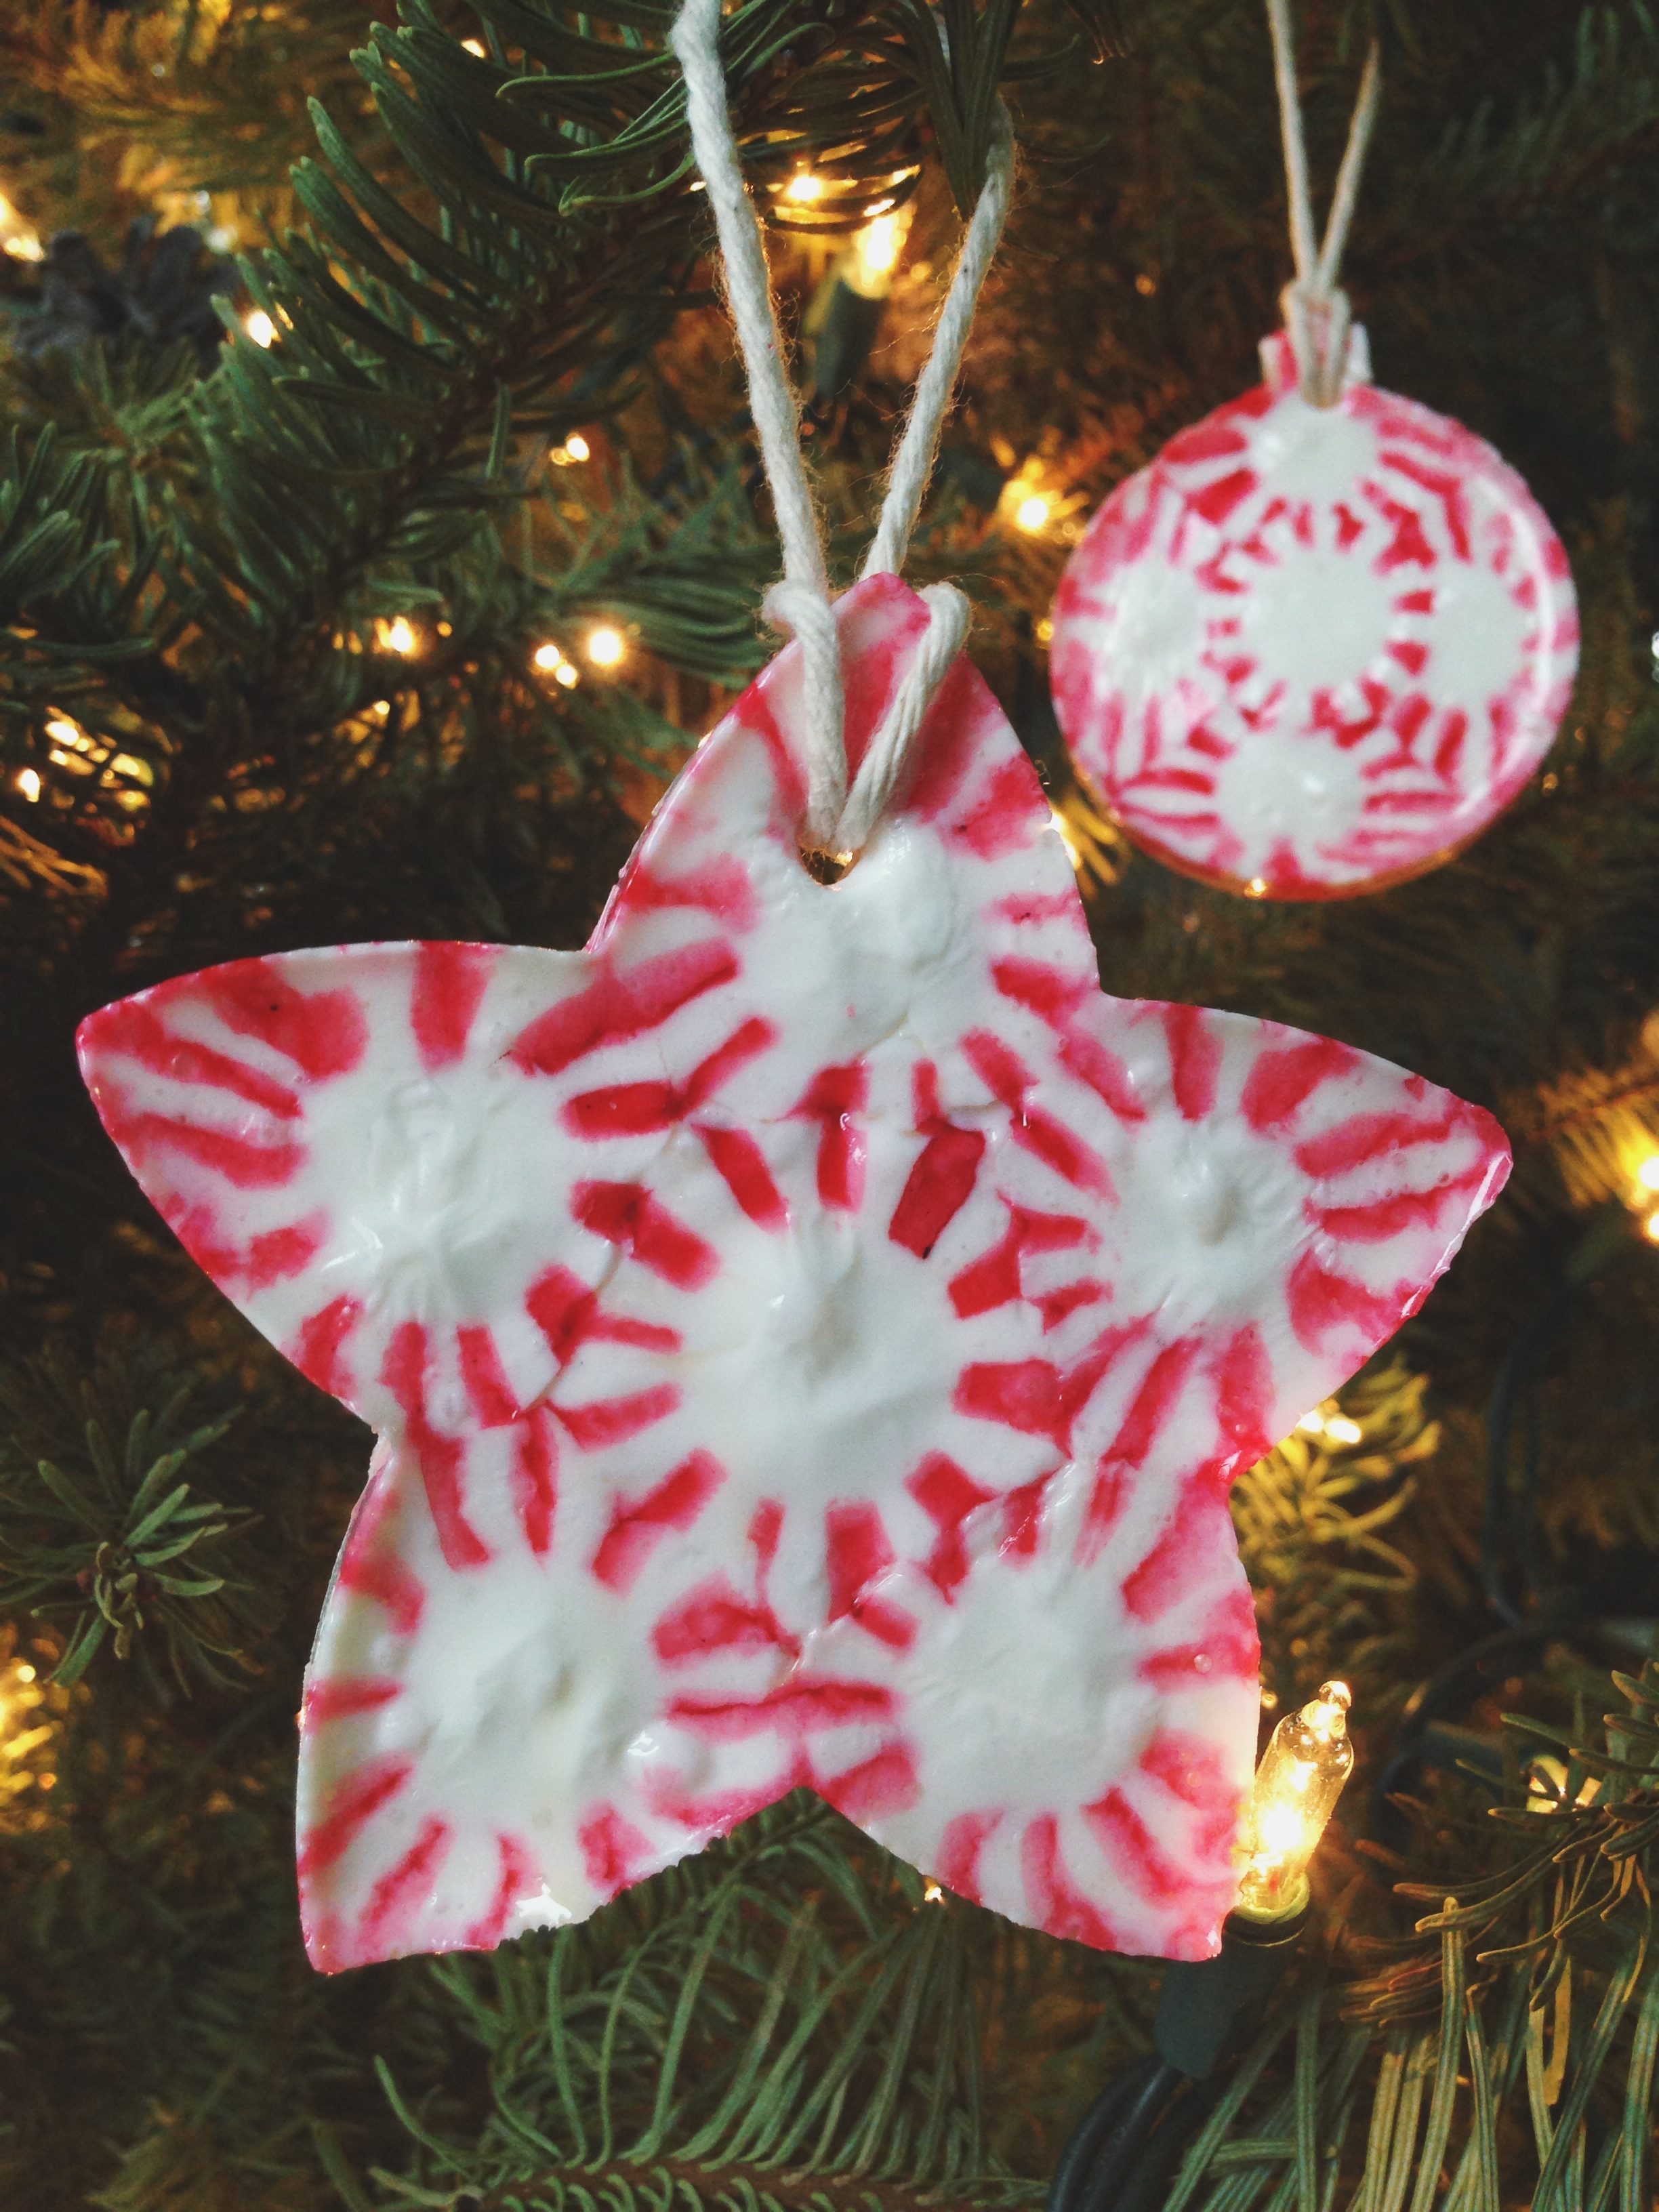
Peppermint Candy Ornaments
- peppermint candies
- metal cookie cutters
- non-stick cooking spray
- parchment paper
- toothpick or skewer
- twine or ribbon
Preheat oven to 350F. Line a baking sheet with parchment paper. Spray the inside of each cookie cutter with cooking spray. Lay cookie cutters on baking sheet and fill with a layer of peppermints.

Bake for 3-9 minutes. Keep an eye on candy as it melts, remove from oven when candies have melted together.

Lightly coat a toothpick with cooking spray and use it to make a hole in each group of candies. Let candy sit inside cookie cutter until it re-hardens. Once hard, carefully stretch out the cookie cutter, pulling it away from the candy, to pop out your ornament.
Wrap these peppermint treats individually in plastic wrap, if you’d like.
• Many of you have contacted me about a sealer that would be suitable for this project. Unfortunately I do not know of any available sealants that would work with these ornaments (the moister of sealers causes the candies to melt). Similar to a gingerbread house, these ornaments may not last for more than a season but it’s a fun (and inexpensive) project to create every Christmas season!
• These ornaments are really so easy, but it may be helpful to make a trial run: Place one peppermint-filled cookie cutter into the oven to get an idea of how fast the candy will melt and how quickly it will cool and re-harden after you remove it from the oven.
• Try turning down the temperature of your oven, so that candies will melt more slowly, if your candies are melting unevenly or at different rates.
• Squeeze as many peppermints, side-by-side, into your cookie cutter as possible. If peppermints melt into too thin of a layer, try layering peppermints in the cookie cutter to make a thicker, more sturdy, ornament.
• Large, simply shaped, cookie cutters work best for this project. The more intricate the cutter, the more likely ornaments will break when removed from their cookie cutter mold.
• Don’t forget to be careful around the hot metal and melted candy! This is a fun craft to make with children, just be sure to provide plenty of supervision.
• Try not to handle the ornaments too much because they can get sticky, but they should be fine after they’re hanging on the tree.
Here’s to a happy handmade Christmas!


these are too cute! I love them!!!
I had good luck with Dollar Tree mints and heating them in a toaster oven at about 310 degrees. Thanks for the post.
Did you have problems with the peppermint candies melting under the cookie cutter and bubbling? They’ve been doing that before they get fully melted and then they crack because of it. I’ve been problem solving this but was hoping maybe you had a suggestion?
I had a tile (or you could use anything flat, heavy, and ovenproof) that I laid across the top of them to keep the weight of the cutters pressed down so nothing seeps under them.
Had the same problem at first. Oven temp is too high. Lower temp of oven and it literally only takes maybe 2-5 minutes of melting as they are done. You have to kind of watch it as it goes . Another tip is to make sure you remove your ornament from the cutter before it has hardened all the way while still flexible.
Your ornaments are gorgeous!!! I love this and we have tried it but our melted candy keeps oozing out underneath the cookies cutters. Did you experience this at all? Maybe mine are too cheap and are warped or something.
Hi Amy, some readers have suggested placing something heavy on top of the cookie cutters to make them lay more evenly on the baking sheet. It would be harder to watch their progress, but it’s worth a try!
can you use plastic or the regular cookie cutters instead of metal ones?
I would recommend that you not put anything plastic into the oven.
Do you have a suggestion as far as what to do, like somehow sealing the ornaments, so ants won’t be attracted to them?
I’m making these tonight for the first time… But I plan to thoroughly coat them with Mod Podge or another sealant once they’re done. A) because I don’t want them to stay sticky and B) buggies. ;)
I tried the Mod Podge technique last night. Results are that any liquid it seems ..at least being “brushed” on , smears the red from the candy all over and ruins the ornament. If you find something please let me know. We made about 13 of them and they are gorgeous but def need a coat of something :0(
I tried 8 different sealers/glues, etc. This was the only one that didn’t melt the candy and actually provided a stiff/glossy finish that took away the stickiness. I did two coats…let them dry 24 hours between each coat. http://www.plaidonline.com/royal-coat-finishes-high-gloss-finish-spray/109/1461/product.htm. I bought this years ago, so am not sure where I got it. Amazon has it right now. Not sure about Michael’s.
Thank you so much for sharing this, Sheila!! I’ve updated the post to include this info!
We plan to give this a try but my girlies want to seal them adding GLITTER!h
I’ve done a few trial runs doing this project, and mine aren’t turning out very good…I have followed instructions to the T too!!!…I do keep an eye on them when they melt. However, are they supposed to bubble??
thanks for saying you’re having trouble too — mine melted at different rates, some bubbled, most lost their candy pattern [turning into a blob of nothing].
i wish someone who has been successful would take the time to walk thru what he/she did — with lots of details like brand of candy, temperature, etc.
and i’m only trying to make the cute trays and coasters — not even as fancy as these ornaments!
thanks —
I used the generic peppermint candies from Walmart for the tutorial pictured above, following the exact directions that I have listed. Ovens retain heat differently, try turning down your oven temp to see if the candies will melt more evenly.
I made these last night. So cute. I read comments and went from there. I put glass cake pan on mine. They came out beautiful.
Fabulous idea my dear !!, I really love this and looks easy and fun to make. Maybe I will consider this one this holiday. BTW, thanks for the inspiration :)
any ideas to keep them from breaking once the out of the cookie cutter
Would it be possible to make these with hard plastic cookie cutters, or do you think they would melt?
I really wouldn’t try to put anything plastic into the oven.
We were thinking that since these are made out of candy that they would be edible but they stick to the paper. 😕 Any hints on how to get them to not stick? As for sealing them, I would wrap them in plastic wrap as soon as they are done, clear seal and still edible. 😀
I make mine in a dollar store throw away pan. They pop right off when done. I do not even use the paper.
I am planning to make these with my kids this weekend as teacher gifts. I’d like to try to figure out if there might be a way to add the year and a name on the ornament. I’m thinking I may just have to use a pretty ribbon with a little card attached that could stay on the ornament, but thought I would ask.
Can’t wait to try making these ornaments!
Teachers save everything . . . at least I did. I would put date and name on it then seal it so teacher can keep it for years to come. I have a special Christmas tree in my office with ornaments from students from 20 years ago and I love it.
Can you eat if you dont seal them with anything?
I tried this for the first time tonight. Took several tries before I got the hang of it. Besides the peppermint candies I used the.skittle flavored candy canes and broke them into pieces. They made colorful ornaments. Need to make another dozen tomorrow night. This time I’ll put the glass cake pan on top of the cutters to keep the candy from oozing out.
I have mad several batches and my ornaments keep breaking. Any thoughts?
Maybe try layering in a few more candies? These tend to be more breakable if the candy spreads out too thinly. Also, it can be difficult to pop out the ornaments if a cookie cutter is too intricate… larger, more simple shapes work best!
Did these before with butterscotch discs (walgreens) and they look like amber glass stars!
Low oven and peek a lot! We used a damp sponge one the edges to get rid of the sharpness.
Horses love peppermint and this is a great idea for all my horse friends at the barn for Christmas presents! We made them last night and they turned out wonderful! I will be trying other colorful hard candies as well. Love love Pinterest!
For my oven I found that 325 degrees worked best. The idea of using a glass 13X9 cake pan on top was great since I then could still watch them as they cooked. I used a wooden skewer to make the holes and also used the pointed end sprayed with non-stick spray to take any excess that had seeped underneath the cookie cutters as soon as I removed them from the oven. I had nice, crisp edges this way!
Made these today with my granddaughters. It was fun. Remember to oil the utensil you use to make the hole. I used a chopstick after trying other things; the chopsticks were the best. I also used at least layers so they were strong enough to pop out of the cookie cutters whole. Also, simple shapes are better. And mints are better than other candies…the others burn too easily.
I used the green starlite mints as well…they came out great! Had a few breaks in the beginning but got the hang of it. Ruled out some of my heavier metal cutters as while they prevented leaks from underneath , they were not pliable enough to pop out the ornaments, so I had to crack them to get them out. Great project overall though and a little trial and error will yield beautiful ornaments!