


Peppermint candies are so festive and classic, no matter what time of the year it is, the sight and smell of peppermints always reminds me of the holidays. Peppermint Candy Ornaments are thrifty and quick to make, they’re a handmade project that is perfect for this time of the year, when we’re all running a little lower on money and time! You could make a dozen of these edible ornaments at just a dollar per bag of peppermints!
These melted candies aren’t just for the tree either! Use this method to create cute little edible toppers for cupcakes or brownies (what is more festive than the flavors of chocolate with peppermint?!).
I first melted peppermints in cookie cutters after seeing the idea in an American Girl magazine, back in the 90’s (I’m pretty sure that a project centered around scalding hot, melted sugar would not make it into a children’s magazine these days). As easy as this project is, I had a difficult time finding anything similar to this online, so I decided to share it.
Include your kids in creating this fun craft project, spend an afternoon making homemade ornaments for decorating your Christmas tree this year!

Metal cookie cutters are a must! I love using this: Vintage Christmas Ornament Set and this: Snowflake Set!
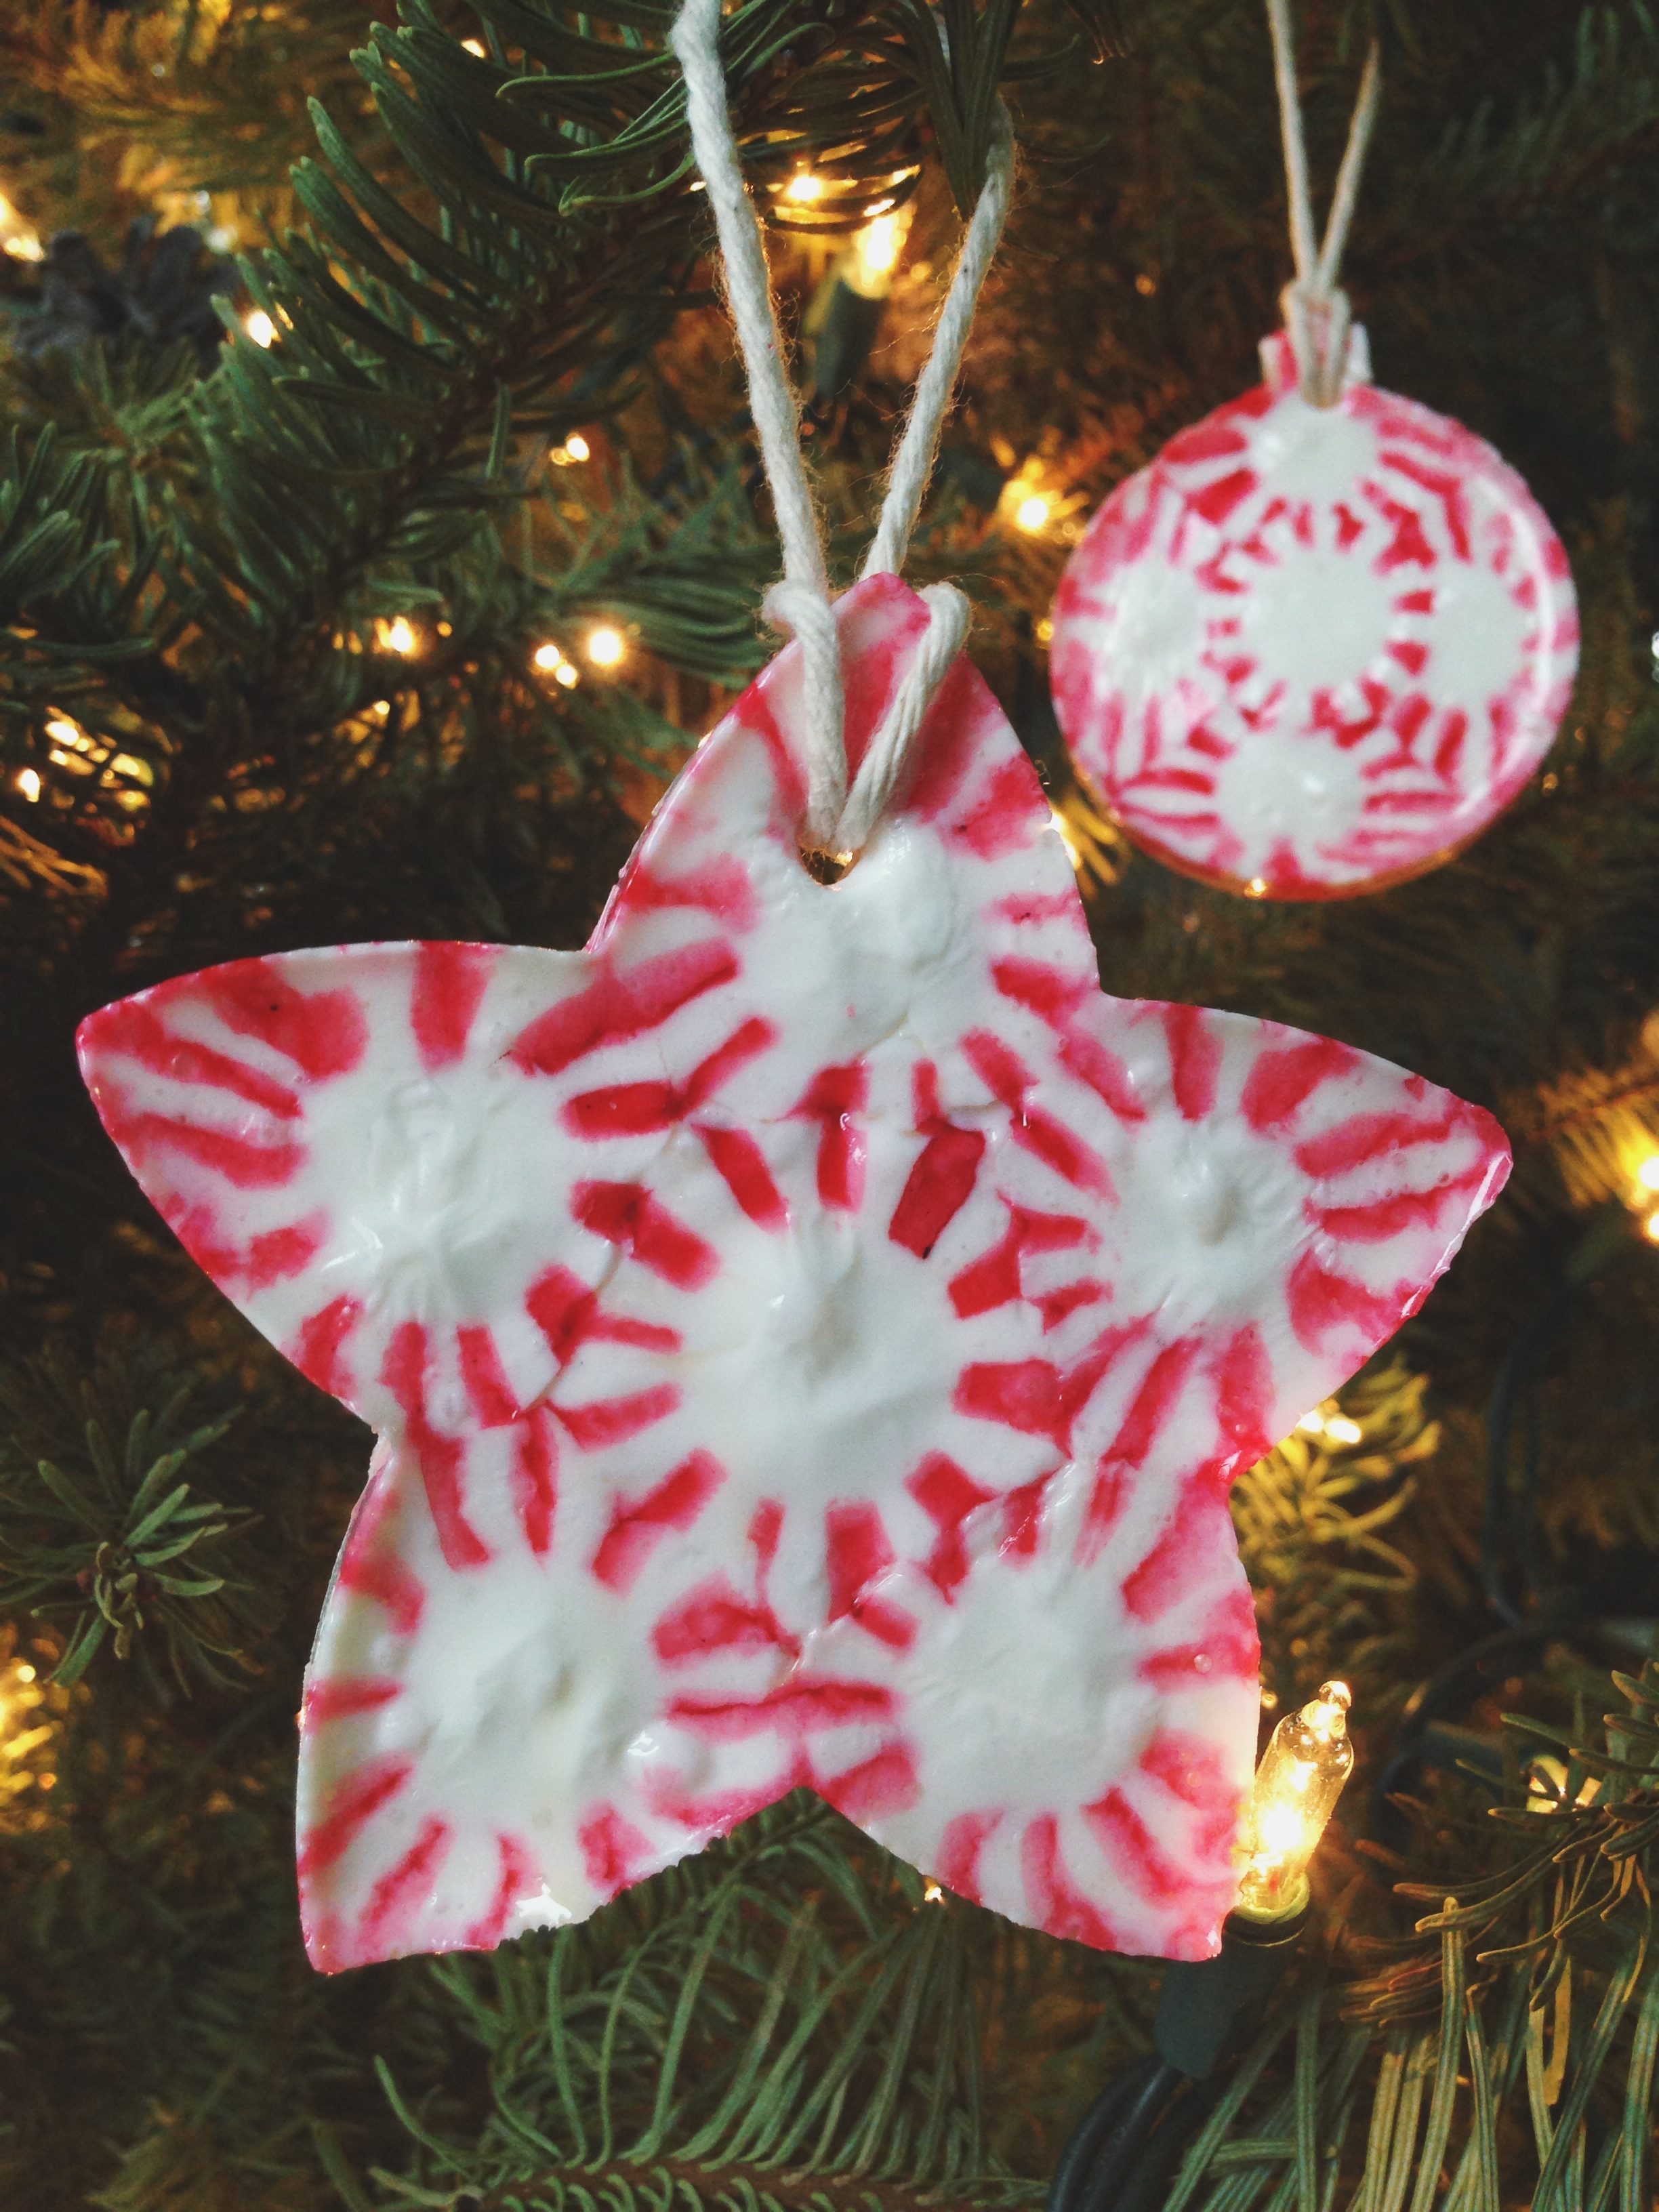
Peppermint Candy Ornaments
- peppermint candies
- metal cookie cutters
- non-stick cooking spray
- parchment paper
- toothpick or skewer
- twine or ribbon
Preheat oven to 350F. Line a baking sheet with parchment paper. Spray the inside of each cookie cutter with cooking spray. Lay cookie cutters on baking sheet and fill with a layer of peppermints.

Bake for 3-9 minutes. Keep an eye on candy as it melts, remove from oven when candies have melted together.

Lightly coat a toothpick with cooking spray and use it to make a hole in each group of candies. Let candy sit inside cookie cutter until it re-hardens. Once hard, carefully stretch out the cookie cutter, pulling it away from the candy, to pop out your ornament.
Wrap these peppermint treats individually in plastic wrap, if you’d like.
• Many of you have contacted me about a sealer that would be suitable for this project. Unfortunately I do not know of any available sealants that would work with these ornaments (the moister of sealers causes the candies to melt). Similar to a gingerbread house, these ornaments may not last for more than a season but it’s a fun (and inexpensive) project to create every Christmas season!
• These ornaments are really so easy, but it may be helpful to make a trial run: Place one peppermint-filled cookie cutter into the oven to get an idea of how fast the candy will melt and how quickly it will cool and re-harden after you remove it from the oven.
• Try turning down the temperature of your oven, so that candies will melt more slowly, if your candies are melting unevenly or at different rates.
• Squeeze as many peppermints, side-by-side, into your cookie cutter as possible. If peppermints melt into too thin of a layer, try layering peppermints in the cookie cutter to make a thicker, more sturdy, ornament.
• Large, simply shaped, cookie cutters work best for this project. The more intricate the cutter, the more likely ornaments will break when removed from their cookie cutter mold.
• Don’t forget to be careful around the hot metal and melted candy! This is a fun craft to make with children, just be sure to provide plenty of supervision.
• Try not to handle the ornaments too much because they can get sticky, but they should be fine after they’re hanging on the tree.
Here’s to a happy handmade Christmas!


I work in a long term care facility and am an Activity Director and am always looking for new ideas and I found them
Love ur candy cane ornaments Thank You for all the neat ideas. :)
I would like to share your peppermint candy ornaments with my cousin but she doesn’t have a facebook account. She just moved out on her own not to long ago, sheds looking for a cheap bit fun way to decorate her house and were both all about stuff being cute not just having stuff cuz its on sale and making it random. I’ve been helping her as much as possible. Is there any way you could e-mail me the information about these so I could share it with her next time I go to her house. It was so far back on my facebook page I can’t even get back to it now.
Hey Heather! You can copy the text and paste it into an email, or copy and paste the text into a document for printing!
How do you prevent the candy from leaking out of he bottom of the cookie cutter?
You can press down on the cookie cutter, while the peppermints are still warm from the oven, to cut off any excesss candy.
Best idea I have had in a long time. Thanks for the blog.
I can’t wait to try making them. I am always looking something new to try. So these will work also am going to try the peppermint ornaments I saw also.
What A Great Classroom Craft! Thanks!
can’t wait to make these with my grandchildren-a great tradition to do each Christmas-thank you!
I am a preschool teacher and am so excited to see this here-will tie it in to the lesson plan on the legend of the Candy Cane……
I bought some spearmint(green) to makes Christmas Trees.
Reblogged this on dawnmelissa.
You say in the instructions to kinda peel the cutters away from the candy. Does this ruin the metal cutters or are they still ok for multiple uses?
Hey Amy, this project shouldn’t ruin your cookie cutters at all! Just gently flex the cutter to loosen the ornament.
why not use a light coating of nonstick spray on the cookie cutter?
That’s suggested in the tutorial directions, Elaine. It’s always worked smoothly for me! :)
what do you mean by clear sealer after?
I was thinking something like this would be good for sealing them: http://www.michaels.com/krylon-make-it-last-clear-sealer/10170246.html
I don’t think you will be able to eat them after you spray clear sealer on them. At least if it is a spray that is associated with paint or clear varnish etc…..
Yes, of course, only seal them to preserve them for decoration purposes!
They can be wrapped in plastic wrap if you plan on eating them.
Hello, would these still be able to be eaten?
Absolutely! Smaller shapes may work best for eating, larger ones could be a jawbreaker!
Love this idea. Passing recipe on to daughter and my Grandson’s beautiful wife. They both have small children it should be a lot of fun. Thank you for sharing. Merry Christmas :-)
Thank you for a great tutorial….I will definatly be doing this one for my tree in England. I just have to stop the kids from eating them before Christmas!! x
Great idea for my grandchildren.
yes I used jolly rancher candies and colored candies from the dollar store.
can any hard candy do this? for instance to make it look like colored glass
yes I used jolly rancher candies and colored candies from the dollar store.
You could probably write on them with a black sharpie or paint pen to make gift tag/ornaments
I love that idea, Gayle!
I would like to a copy of this okay thank you
Hi Linda! You can copy and paste this tutorial into an email or document for saving or printing.
This sounds incredible …cannot wait to do with granddaughter…she us on vacation next week…yeaaa thanks sooo much for sharing….
I had a problem getting them off of the metal cookie cutters. Even flexing them. I ran out of PAM non stick spray and just used vegetable oil. Could that be the problem? Does pam work better?
Hi Stacy! I’m really not sure, but it’s possible that could be an issue… I know that I always have more success when I bake with PAM vs. regular vegetable oil.
What a fabulous idea! I just pinned to my crafts board; can’t wait to try this :-)
I tried this tonight and the only issue I had was when did a bulb with the extra candy on top, by the time the raised candy melted the others were “over” melted and turned slightly dark. I’m going to experiment again tomorrow night .
Could you take a toothpick and swirl the colors? I think I would really like that look.
I love that idea, Jenny!
Has anyone tried using silicone type cutters or molds?
ooh, that sounds like a great idea!
I am make these for my grandchildren for their tree so they can hang them on theirs
I was excited to see this recipe! I made these for my daughter’s Girl Scout Troup back in the ’90’s – from her American Girl magazine:) Very fun recipe!
That’s so awesome that you remember this from the American Girl magazine as well!
I hope the children will the difference -from the regular ornaments,i think if there are small children I would have a extra tree ;or placed near the top of tree .I to think you could have both sides of candy ornament different -plain -other side different perhaps -sprinkles-any thing edible that well melt-if your afraid of the melted candy eezing out while in the -put a heavier pan on top.
I would like to know if they’re edible as well?
They absolutely are edible! Just use clean cookie cutters, don’t spray them with any kind of a sealer, etc.
my grandchildren and I are going to make these today. We are also going to try using Jolly Ranchers for something a little different. I will let you know how they come out.
I’m assuming they’d be edible but I’d like to know for sure. Does anyone know?
They absolutely are edible! Just use clean cookie cutters, don’t spray them with any kind of a sealer, etc.
I tried this but some of the candy started to bubble before the rest was melted. Suggestions?
Maybe try using a lower oven temp? The candies will melt more slowly and maybe more evenly.
Seems like my oven is taking forever to preheat!!!!!!!!!
Wonder if Mod Podge would work as a sealer? Going to give it a try! Love these :) If not…will just have to eat them!!
Don’t use lacquer on these……melts them…….back to the drawing board for a sealer
If I don’t have parchment paper, would wax paper work?
I’d be concerned that the wax paper might melt… I don’t think you’re supposed to put it in the oven? You could try making one on aluminum foil with a light coating of cooking spray.
What do you use to seal the ornaments?
I wonder would candy canes work as well? I’m looking for some different color options and thought that might be a good idea. Someone used jolly ranchers, I will have to get some of those too. I’m going to make them with my nieces and nephew! Thanks for sharing this.
i made some also, does anyone know how to clear coat them ?
do you seal the ornaments? Or did you just leave them as hard candies? Thanks in advance
Could u do this with any hard candies????
I was just coming to note that I’ve seen jolly rancher type candies used this way for “stained glass cookies” and I bet they would work well for this…
My daughters and I made these last night. So easy and they look great. I had 5 different heart shaped metal cookie cutters. We made 15 ornaments in about 45 minutes. Great family project!
Every time I have tried this, the candies melt at different rates and they lose the pretty pattern, too. I’m just using cheap red and white peppermint candy. Is there a secret I’m missing?
Try pre-heating the oven to a lower temp… candies will melt a bit slower and maybe more evenly.
I love this idea, My children and I are going to make it for a gift for their teachers for the end of the year.